Any user in TherapyNotes may be assigned as a Supervisor for Clinicians or Interns. Supervisors may need to review their supervisees' notes or provide feedback on notes outside of a formal supervision session, and supervisees may even need to bill a service using their supervisor's credentials (also known as "incident-to" billing). This is especially effective when an intern is providing a billable service, although each payer will have their own guidelines on what qualifies as an incident-to-service. When in doubt, consult your contracts or contact the payer to verify eligibility to bill as a supervisor.
Supervisors in TherapyNotes may have the ability to access their assigned
supervisees' notes, review and approve their supervisees' notes, or review
and co-sign notes for their supervisees. You may also set whose information
(the rendering provider, the supervisor, or both) is included on claims.
Assign Supervisors and Set Up Supervision
Assign the Role of Supervisor to a User
- Click Staff > Staff name
- Click anywhere on the Roles box to edit the user's roles.
- Select the Supervisor checkbox.
- Click the Save Changes button.
Configure Supervision Settings for Supervisees
- Click Staff > Staff name
- Click anywhere on the User Information box to edit.
- From the Supervision dropdown, select the appropriate supervision permissions.
- Access patient notes and co-sign notes for selected payers: The Supervisor can view all client notes but does not approve or co-sign the note before it is entered in the client record. However, this setting may be overridden per payer.
- Must review and approve all notes: Whenever the supervisee completes a note, a To-Do list item will be generated for the Supervisor to approve the note before it is entered in the client record.
-
Must review and co-sign all notes: Whenever the
supervisee completes a note, a To-Do list item will be generated for
the supervisor to co-sign the note. This action is required to bill under
the supervisor's credentials.
- Once a level of supervision is selected, the Billing and Supervisors dropdowns appear.
- From the Billing dropdown, select how the supervisee can bill insurance.
- From the Supervisors dropdown, select the appropriate Supervisor for the supervisee. You may select more than one Supervisor as needed; the supervisee will need to choose which Supervisor is needed for each session in the header of the relevant note.
- Click the Save Changes button.
If you selected Bill as clinician unless otherwise selected in a payer's settings from the Billing dropdown, follow the steps below to configure Bill as Supervisor per payer.
Edit Supervision Billing Settings Per Payer
- Click Staff > Staff name > Billing tab
- Click anywhere on the Payers box to edit.

- In the Supervisor Billing column, click the Supervisor Billing entry to display the dropdown, then select the preferred billing method from the dropdown.
Select Bill as Clinician to include only the rendering provider's information on claims OR
Select Include Clinician and Supervisor to include information for both the rendering provider and the supervisor, OR
Select Bill as Supervisor (Incident-To) to include only the supervisor's information.
- Click the Save Changes button.
Configure Supervision for Specific Notes
Occasionally, you may need to change the Supervision settings on a per-note basis, such as when there are two possible Supervisors for a date of service. You may also need to go back to notes that were completed prior to turning on the setting, or edit the note after your billing contract changed.
Edit Supervision Billing Settings Per Note
- When creating or editing a note, click anywhere on the note header or click Edit in the upper right corner of the note header to open it.
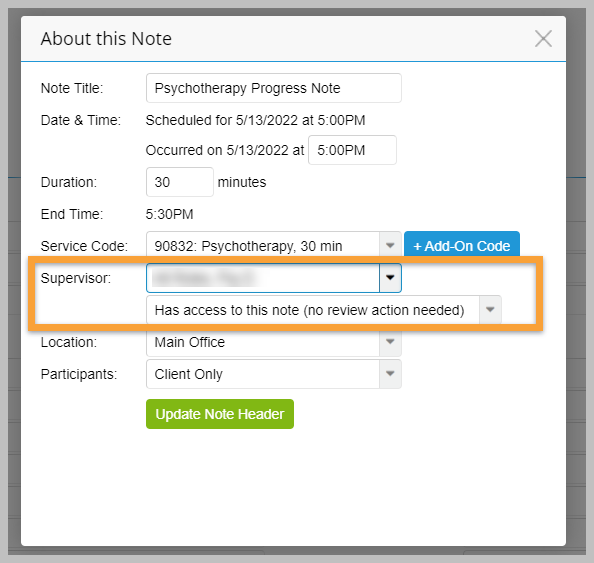
- From the Supervisor dropdown, select the Supervisor associated with the note if more than one supervisor is assigned to the supervisee.
- From the dropdown below, select the level of supervision required for the session.
- Click the Update Note Header button.
The changes will take effect after the supervisee signs the note. The new supervisor will see a prompt to approve or co-sign the note in their To-Do list under Notes to Review.